Graham Cracker Crust Recipe: Your Base for Delicious Desserts
You know that the humble graham cracker crust is the secret to elevating many classic desserts. This iconic component has been a staple in kitchens across America for generations, providing both flavor and texture to an array of sweet treats. This simple yet versatile base not only adds a delightful crunch but also infuses a subtle sweetness that enhances your favorite pies and cheesecakes.
In this article, we will explore the step-by-step process of creating the Graham Cracker Crust Recipe, along with tips for customizing it to suit your tastes. By the end, you will be equipped to impress your friends and family with a delicious dessert that’s both easy to make and hard to resist.
Why Choose Graham Cracker Crust?
Choosing a Graham cracker crust for your dessert is a decision rooted in both convenience and versatility. The ease of preparation makes it an attractive option for home bakers, as it requires no complicated equipment or ingredients. Simply crush the crackers, mix them with melted butter and sugar, and press the mixture into your pie dish.
This no-roll option eliminates the stress of rolling out dough, making it accessible even for novice bakers. The no-fail texture of a Graham cracker crust ensures that it stays crisp and crumbly throughout the baking process. This reliability allows you to focus on perfecting your filling rather than worrying about the base.
Its neutral flavor is another significant advantage, the subtle sweetness of the crust complements both sweet and tangy fillings beautifully, making it a versatile choice for everything from cheesecakes to fruit tarts. Embracing a Graham cracker crust means embracing simplicity without sacrificing taste or quality in your desserts.
Ingredients for Graham Cracker Crust
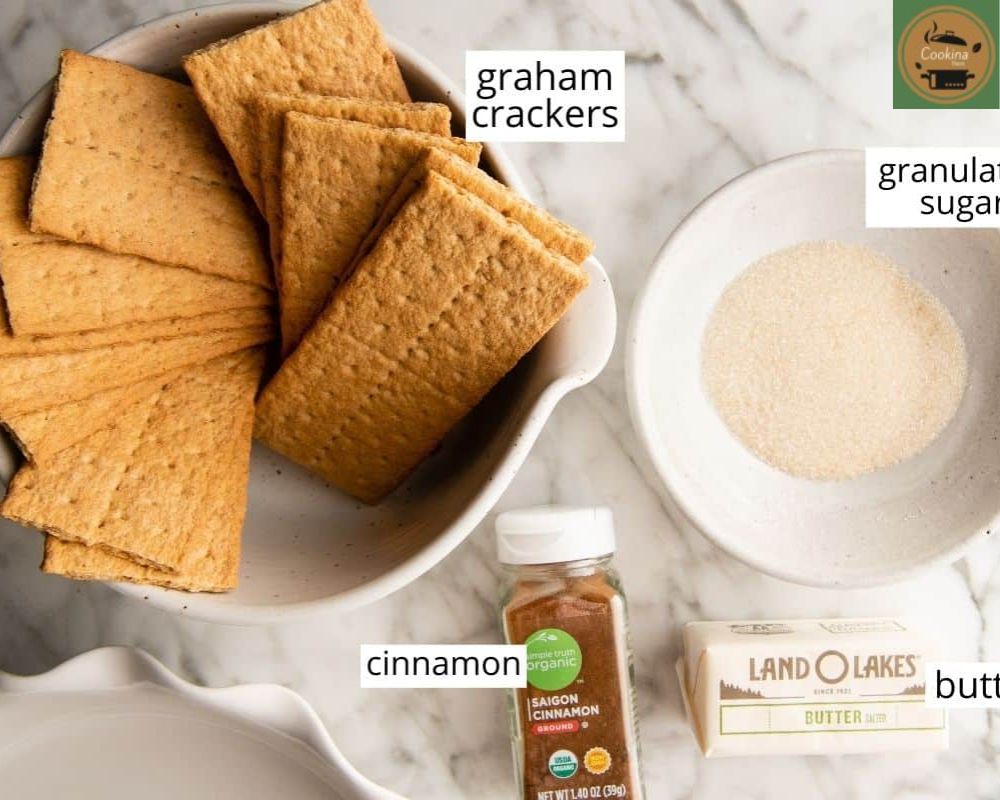
- 1 ½ cups graham cracker crumbs (about 10–12 full sheets)
- ¼ cup granulated sugar
- 6 tablespoons unsalted butter, melted
- ¼ teaspoon salt (optional but enhances flavor)
Optional Add-ins:
- ½ teaspoon cinnamon for a warm, spiced touch
- 1 tablespoon brown sugar for a deeper sweetness
Step-by-Step Graham Cracker Crust Recipe
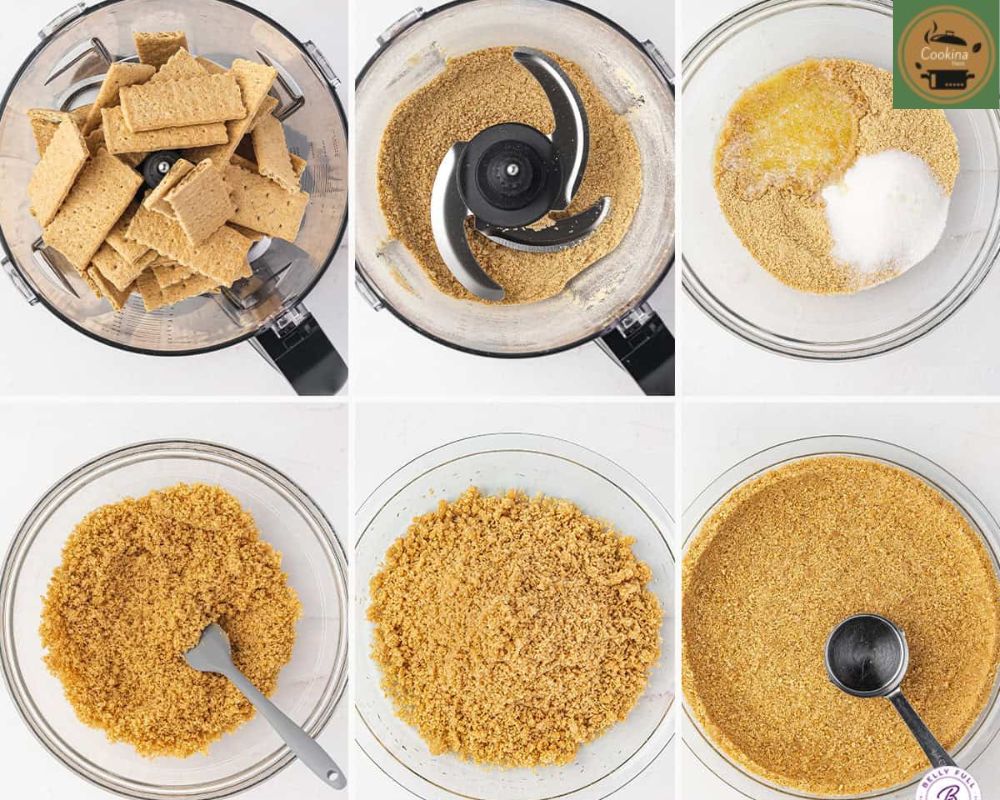
Step 1: Crush the Graham Crackers
Crushing graham crackers is the crucial first step in creating a delectable crust that will elevate your dessert to new heights. If you’re starting with whole graham crackers, break them into smaller pieces and pulse them in a food processor until they turn into fine crumbs. This method not only saves time but also ensures a uniform texture that binds beautifully when combined with melted butter. The aroma of freshly crushed graham crackers can transport you straight to a cozy kitchen, filled with the promise of sweet treats.
Step 2: Mix the Ingredients
In a medium mixing bowl, combine the graham cracker crumbs, granulated sugar, and salt. Stir until evenly distributed; this simple step is crucial as it ensures that every bite of your crust has the perfect balance of sweetness and flavor. The granulated sugar adds a touch of sweetness that complements the natural flavors of the graham crackers, while the salt enhances the overall taste, creating a delightful contrast.
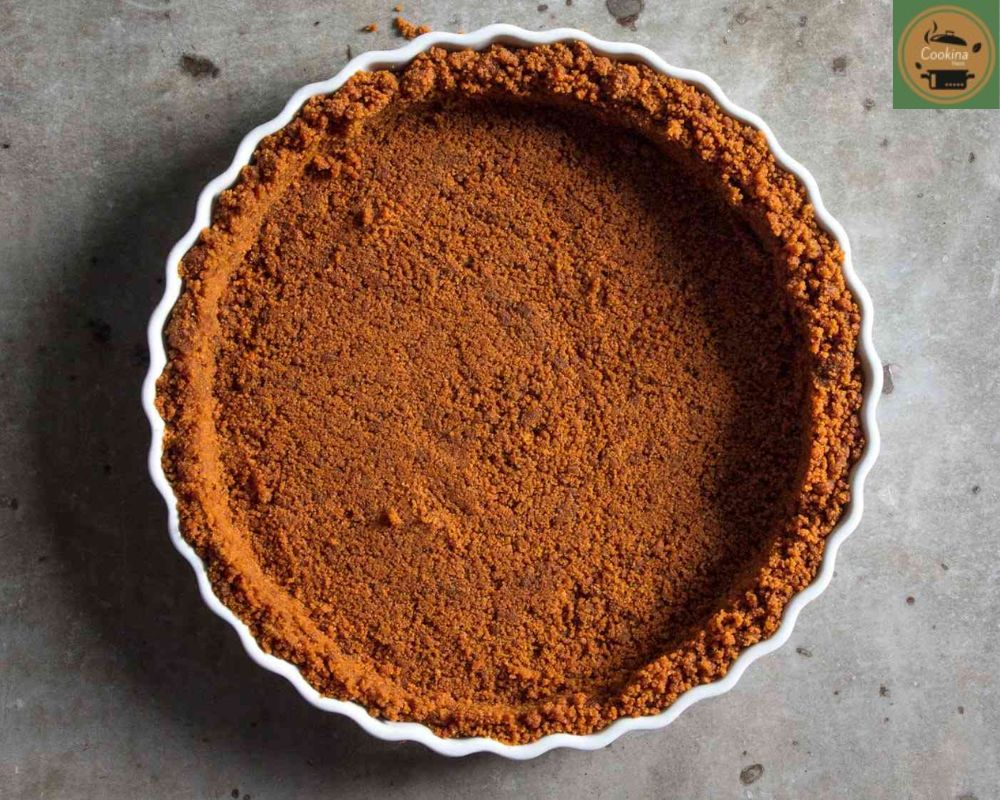
Step 3: Press Into the Pan
Creating a perfect graham cracker crust is an essential skill for any dessert enthusiast. Once you’ve crushed the graham crackers into fine crumbs, it’s time to bring your crust to life. Pour the mixture into a pie plate or springform pan, ensuring an even distribution across the base. This step is crucial; a well-distributed crust sets the foundation for your pie or cheesecake, enhancing both texture and flavor.
Step 4: Bake or Chill
Creating the perfect graham cracker crust is a versatile skill that enhances both baked and no-bake desserts. For baked desserts, start by preheating the oven to 350°F (175°C). Combine crushed graham crackers with melted butter and sugar, pressing the mixture firmly into a pie dish. Bake the crust for 8–10 minutes until it turns lightly golden and releases a deliciously fragrant aroma.
This step not only gives your dessert a delightful crunch but also helps to seal in flavors, ensuring a delectable base for your filling. Remember to let it cool completely before adding your favorite custard or cheesecake mixture to allow for the best flavor integration.
Tips for the Perfect Graham Cracker Crust
- Use Fine Crumbs: The finer the crumbs, the more cohesive your crust will be.
- Measure Accurately: Too much butter can make the crust greasy; too little and it won’t hold together.
- Compact Evenly: Press the mixture firmly and evenly—uneven spots may crumble or break.
- Don’t Overbake: A quick 8–10 minute bake is all it needs to set. Overbaking can make it too hard.
- Cool Completely: If you’re adding a cold filling, let the crust cool completely first.
Variations on the Graham Cracker Crust
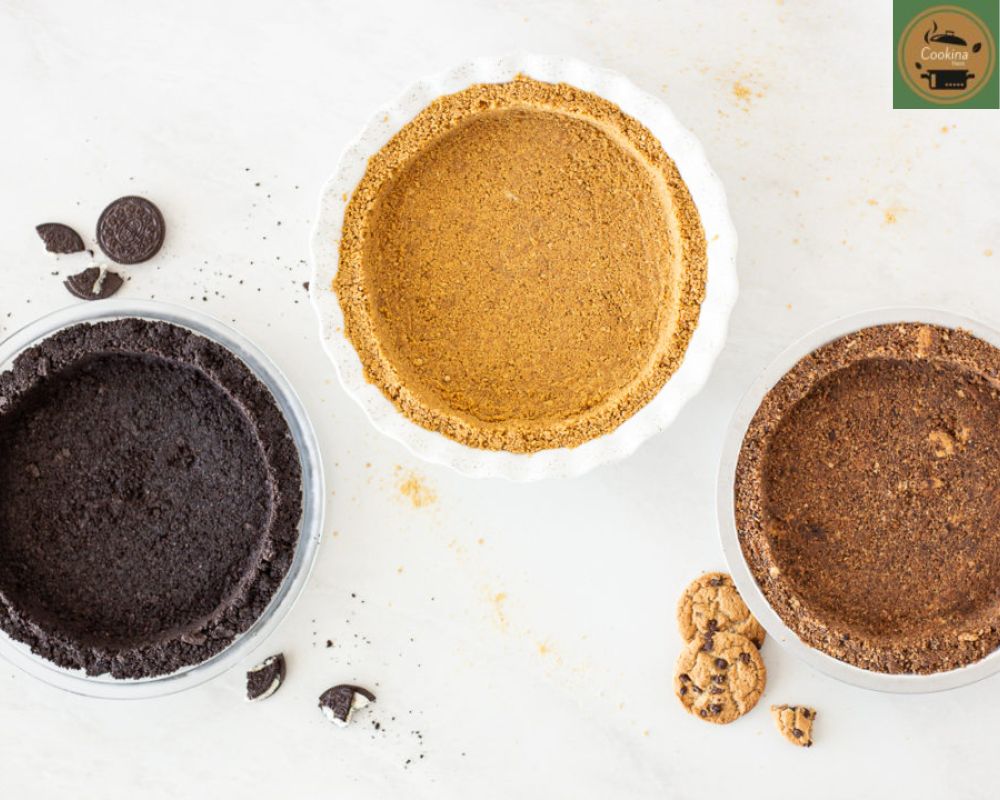
Chocolate Graham Cracker Crust
When it comes to elevating your dessert game, swapping out regular graham crackers for chocolate-flavored ones can make all the difference. This simple modification adds a rich chocolate base that beautifully complements a variety of fillings, transforming traditional desserts into decadent treats.
Gluten-Free Version
A gluten-free graham cracker crust can be just as delicious and versatile as its traditional counterpart, offering a delightful base for your favorite desserts. By using gluten-free graham crackers, which are widely available in most grocery stores or online, you can easily whip up a crust that caters to dietary restrictions without sacrificing flavor.
Nut-Enhanced Crust
Elevating the classic graham cracker crust can be as simple as incorporating a variety of nuts into the mix. By adding ¼ cup finely ground almonds, pecans, or hazelnuts to the crumb mixture, you introduce a delightful nutty twist that enhances both texture and flavor. The richness of these nuts complements fruity fillings like raspberry or lemon, while also harmonizing beautifully with decadent chocolate ganache.
Honey or Maple Sweetened
When it comes to creating a delicious graham cracker crust, experimenting with natural sweeteners like honey or maple syrup can transform your dessert experience. By replacing the traditional sugar with just 2 tablespoons of honey or maple syrup, you not only introduce a wholesome sweetness but also infuse your crust with unique flavor profiles.
Read More: Zucchini Fritters Recipe: A Delicious Way to Use Up Summer Squash
Final Thoughts
Mastering the Graham cracker crust opens up a world of dessert possibilities that are both easy and satisfying. Its delightful crunch and subtle sweetness make it an ideal foundation for a range of fillings, from creamy cheesecakes to fruity pies.
By following the straightforward steps outlined in Graham Cracker Crust Recipe, you can elevate your baking game and impress your guests with minimal effort. Do not hesitate to experiment with flavors and add-ins to personalize your crust further. Get started today and enjoy the satisfaction of creating delicious treats right from your kitchen.
FAQs
Can I use store-bought graham cracker crumbs?
Just be sure they are fresh and not stale. You’ll need about 1 ½ cups.
Can I reduce the sugar in the crust?
Yes, you can reduce the sugar in the crust to as little as 2 tablespoons without sacrificing too much of the overall flavor. This simple modification can make a significant difference, especially for those looking to cut back on their sugar intake.
How do I keep the crust from crumbling?
Make sure your crumbs are very fine, use the full amount of butter, and press the mixture firmly into the pan.
Why is my crust greasy or soggy?
A greasy or soggy crust can be a frustrating culinary mishap, often leading to disappointment when you slice into your creation. This frequently occurs due to too much butter in the dough, which can overwhelm the flour’s ability to absorb moisture.